Hi Bloggers! Happy Sunday + Happy Easter! I hope you're having a great day! I'm totally thrilled to have not one but 2 gorgeous & festive projects from our dear friend,
Lisa Spangler! Without further ado, I will let
Lisa explain how you can make your own versions of these beauties!
Hi! It's Lisa Spangler,
and I'm so happy to be here! Today I have two projects to share with
you that both feature the Tim Holtz Easter Elements die set. I love
this die set, and even though it has “Easter” in the name I think
it's so versatile that you can use it all year long!
First up, I'm going to
share a quick and easy place card setting for your Easter table.
Shop the supplies:
Just cut two bunnies
out of Hero Arts mocha paper for each place card that you need. One
will become the front of the bunny and one will be the back. This die
works so well that you can cut two bunnies out in one shot – real
time saver! Here's another tip: Hero Arts papers are colored on one
side and white on the other, so place your papers so that the white
sides are touching when you run it through the machine.
Clear emboss the
bunnies, then rub on tea dye and vintage photo distress inks. Next,
use a bone folder and a ruler to score the bunny for the back as
shown.
Next, put adhesive
above the score line and press the two bunnies together. I
like to use a glue stick for this as I find that it holds better.
For the nose, put a
glue dot where the nose goes, trim off any that hangs over the edge,
and adhere pink flocking. So cute!
To finish up, adhere a
pom-pom tail to each bunny, then cut out a banner and stamp each
person's name with gold ink. Adhere with foam tape and you are done!
--------------------
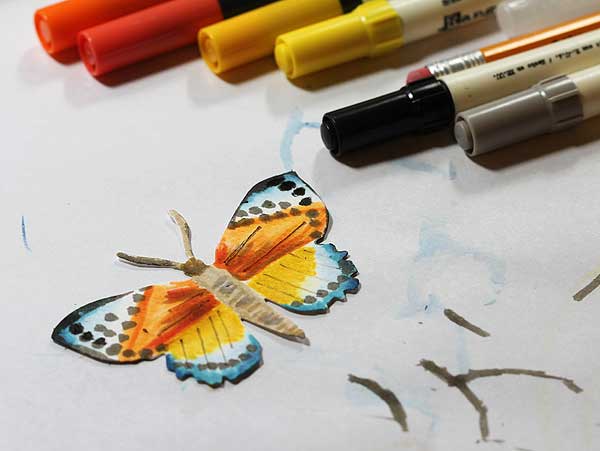
Next I wanted to share
an idea using the butterfly die that comes in the set. This may look
complicated, but it's actually pretty easy thanks to the magic of
distress markers. I like to grab my trusty butterfly field guide when
I'm coloring butterflies so I get some ideas for their markings. I
don't worry about making them too realistic, though!
Shop the supplies:

Let this dry (you can
help it along with a heat gun if you like.) Then add some gray and
black dots, and some lines using the fine point end of the black and
gray markers, then go over with water again and let it dry. Here's
how it looked before going over it with water:
To finish up the
butterfly, give it a good mist with perfect pearls and water and let
dry. Just be sure your butterfly is dry before you mist it so the
colors don't run too much! Here's a closeup of the finished
butterfly:
To make the card base,
first stamp Hero Arts' Life Can Be with Charcoal mid-tone ink on a
white notecard. Then squish a tea dye ink pad on an acrylic block to
make a palette. Grab a broad tip water brush and pick up some tea dye
ink, and paint the upper left and lower right corners. While it's
still wet, brush on some vintage photo distress ink, picking the ink
up directly from the ink pad. Let dry.

Mist the card with
gold, buttercup, and boss lady Mister Huey's and let dry. Then add
washi tape, gold glitter tape, sew on some sequins, adhere the
butterfly with foam dots. All done!
Thanks so much for
joining me today! Happy spring! xo
Thanks for reading, and thanks again to
Lisa!!
Blog Candy Alert! Join our following and comment on this post for a chance to win a special blog candy!
Pin It
SUBSCRIBE TO:
This Blog | Our Newsletter
WE'RE SOCIAL:
Facebook | Twitter | YouTube | LinkedIn | Pinterest | Google+
TAKE THE CHALLENGE:
Simon Says Stamp Challenge! | Vintage Simon Says Stamp & Show Challenge


