Tuesday, September 29, 2009

Basic Grey Eerie, Eskimo Kisses, Indian Summer in Stock Now at Simon Says Stamp!


Basic Grey has really outdone themselves with their new 2009 collections: Eerie, Eskimo Kisses, Indian Summer and Nook & Pantry. I am so impressed with their new Halloween collection I wanted to highlight some of the new items we just got in.


Do you see the detail behind the Boo Bitsy clear stamp set?! I am loving how they incorporated the skull, spider webb, blood and roses to make one large spooky image. They have great coordinating embellishments, like these buttons, for each collection. These buttons match the paper pads and card kits perfectly!!


Find more clear stamp sets from Basic Grey, like this one called Halloween! Spiders & webs are all you need to make the perfect card.


Basic Grey has gone above and beyond to make these pre-cut card kits just for you! You can find them for each of the new 2009 collections. There is enough patterned paper, die-cuts, printed and scored cardstock, rub-ons, printed chipboard, and envelopes to create 8 unique cards.


We all love the 6" x 6" paper pads but don't forget that they also have these great 12" by 12" collection packs! Their collection packs include 18 double sided papers, one sheet of coordinating letter stickers and one sheet of coordinating ornaments stickers. This paper pack is filled with creepy crawlies, ghostly ghouls, and bone-chilling bats!! Spiders and skeletons prance across the page in slimy green, purple, orange and black. Thank goodness it's just paper!


And just when you thought it couldn't get any better, it just did with these Do Me A Favor gift boxes!! How cool?!?! Eerie favor boxes will put the Trick in your treat this All Hallow's Eve. For gift-giving, party favors or just because they are so frighfully cute, Basic Greys favor boxes are the perfect size to tuck away a small present, a handful of candy corn or even a fake spider. Each kit makes six designer boxes and comes complete with step-by-step instructions and illustrations.


I hope you all enjoyed the eye candy and have been inspired to create some spooky stuff for this year's Halloween projects!

Amber

Pin It
SUBSCRIBE TO: This Blog | Our Newsletter
WE'RE SOCIAL: Facebook | Twitter | YouTube | LinkedIn | Pinterest | Google+
TAKE THE CHALLENGE: Simon Says Stamp Challenge! | Vintage Simon Says Stamp & Show Challenge

Fall for the NEW "Scents" from Whiff of Joy!!!!


Sitting Farmer Oakley


Fall Willow Catching Leaves

Wow! Sometimes I can't even believe that Fall is officially here, just where did the Summer go? Fall happens to be my favorite season...just as it starts to get cool enough to wear a light jacket, have a bonfire, and snuggle up with someone special. :)

Whiff of Joy is very popular here at Simon Says Stamp (It's a brand Heidi LOVES!), and we are very excited to have in stock NOW, these darling new additions that are perfect for a fall card, scrapbook, or special place cards to place at your table for Thanksgiving. The turkey stamp would be too cute for this.

While you're shopping...don't forget your coordinating papers, markers, and inks to complete your beautiful creation!

Have fun, be creative, and prosper!

Steph


Turkey Plus Sentiment


Sitting Fall Willow


Fall Willow with Grapes


Fall Willow Holding Corn Basket

Pin It
SUBSCRIBE TO: This Blog | Our Newsletter
WE'RE SOCIAL: Facebook | Twitter | YouTube | LinkedIn | Pinterest | Google+
TAKE THE CHALLENGE: Simon Says Stamp Challenge! | Vintage Simon Says Stamp & Show Challenge

Friday, September 25, 2009

PERSONALIZATION IS KEY!!!!


Personalization is the key to finishing your paper craft projects! Let that certain someone know how many grueling hours and blood, sweat, and tears were put into their handmade gift by signing your name!!!! Don't forget to date your piece of art, also!

Here are a few of my favorite "Personalization" products for your viewing pleasure...


This stamp, to the left is called "Handmade" and is by Inkadinkado. I think this one is cute because of the little hand writing out the words. I usually sign below this stamped image. It is the perfect size for customizing the back of your handmade cards!


I love this "Limited Edition" stamp by Hero Arts. Here, to the right, are some examples using this stamp courtesy of the Hero Arts Website. The purple they used in these cards is gorgeous. It's my new favorite color!

If you are looking for a great way to customize your creations, we have lots and lots of fabulous choices in our store. Just click HERE! All different sized and style are available.

And for the paper crafters, this lovely heart charm from Darice is PERFECT!!! It is called "Made With Love" and would make any project complete with this little dandy hanging off of it. And you get 75 in one pack - what a deal!


****BLOG CANDY ALERT**** Let me know what your favorite personalization product is from our store. Or, let me know if you use a favorite that we don't currently carry! We want to make your favorites available to everyone! We will draw a random winner at the end of the week and that person will win ONE PACKAGE of DARICE MADE WITH LOVE CHARMS! Woohoo! You know you want them!

As for now, I will leave you with a few more items that may "MAKE" your day! tee hee ~TERRA


BEE STAMPED (STAMPENDOUS)


CREATED BY (HERO ARTS)


ONE OF A KIND (WENDY VECCHI/STAMPERS ANONYMOUS)


Pin It
SUBSCRIBE TO: This Blog | Our Newsletter
WE'RE SOCIAL: Facebook | Twitter | YouTube | LinkedIn | Pinterest | Google+
TAKE THE CHALLENGE: Simon Says Stamp Challenge! | Vintage Simon Says Stamp & Show Challenge

Thursday, September 24, 2009

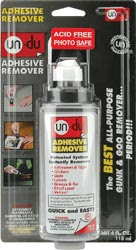
In a "sticky" situation?! Simon to the rescue!


We asked, and you happily obliged us with many of your favorite adhesives and ones that you would like to see in our store.

We have seriously widened our variety to suite many projects and we hope you are pleased with the additions that can help make your projects more beautiful!

The items you see on this blog are BRAND SPANKIN' NEW! Check out our site for the rest of our selection in glue & adhesives! Is there something else you would like to see? Please let us know!

Check out the ATG GUN! It's finally here...and it COMES WITH ADHESIVE!

Have fun, be creative, and prosper!
Steph


Pin It
SUBSCRIBE TO: This Blog | Our Newsletter
WE'RE SOCIAL: Facebook | Twitter | YouTube | LinkedIn | Pinterest | Google+
TAKE THE CHALLENGE: Simon Says Stamp Challenge! | Vintage Simon Says Stamp & Show Challenge

Wednesday, September 23, 2009

Please Welcome Greta! 11 Year Old Crafter!

DD Greta--Cardmaker Extraordinaire

Simon Says Stamp
welcomes folks of all shapes, sizes, ages, origin, race, nationality, sex. As you know, we welcome EVERYONE!! However, it is not so often we get the opportunity to work with a junior card maker! Please welcome GRETA! We have GRETA joining us in the Designer Spotlight at our Simon Says Stamp Challenge. Won't you please pop by her blog and leave her a comment? She has very kindly made 2 fabulous cards for us to show you this week, one with real sewing and one with faux !! Greta is only 11 years old and started cardmaking last October, she is really talented and plays the piano, competes in gymnastics and is a Girl Scout too ! Greta shares her blog with her mom Lisa who is also a very talented cardmaker :-)

It is very touching to me that Greta and her mom share in a passion. It is a gift they can share together. Imagine the chats us girls have while we are crafting! It's a real treasure for a mother and daughter to work side by side.

Did you know we have a mother / daughter team here in our Simon Says Stamp offices too? Carla and Terra are mother and daughter. Terra has been with us since the beginning of time and Carla joined us a bit over a year ago when we were desperate for help in expanding our store. We love and appreciate them both very dearly.

When I was a little girl (hundreds of years ago!) I used to like to garden with my mom. She had a large garden in our yard where she grew sweet corn, strawberries, carrots, peas, tomatoes, beans and so much more! She once told me she would pay me 5cents per beatle that I could pick off the beans. Til this day, she still talks about how she thought I would pick just a few beatles and quickly grow bored, but hours later I brought her a huge jar full of beatles! It broke her bank;) My favorite thing to do (besides eating fresh produce) was to dig up potatoes. It was like a treasure hunt to find the next buried spud! Thanks for the good memories, and the fresh delightful produce mom!


Is there something you like to do with your children or your parents? We'd love to hear your stories! Please comment here:) Don't forget to pop by Greta's & her mom's BLOG HERE. It would be so nice to support a junior card maker! Spread the love:)

Much luv,
Heidi

Pin It
SUBSCRIBE TO: This Blog | Our Newsletter
WE'RE SOCIAL: Facebook | Twitter | YouTube | LinkedIn | Pinterest | Google+
TAKE THE CHALLENGE: Simon Says Stamp Challenge! | Vintage Simon Says Stamp & Show Challenge

Tuesday, September 22, 2009

September Monthly Tutorial by Michelle Roos


Thank you Michelle Roos for working hard to create a tutorial for us to all enjoy and view!

We were so delighted and honoured when the very talented Michelle of My little Space on the WWW agreed to do a tutorial of her gorgeous flowers for us. Thanks so much Michel. Please drop by her blog and prepare to be amazed by her fantastic work!!

The next challenge at JUST MAGNOLIA TOO is based on this tutorial will run for a two weeks starting on Saturday 19th September and will close on Saturday 3rd October at 10pm.

List of supplies used

Sizzix Flowers Layers Die

Craft paper

Tweezers

Scissors

Distress ink

Kitchen sponge

PVA glue


First off cut out two medium size flower shapes and 4 small.On the back of each flower shape, roughly draw a circle in the center:


On each flower, cut down into the petals to open them up a bit more

To add a bit of definition to the flowers, ink the edges of each petal as in the above picture.


Now on the right side of each flower, curl all the petals inwards using either tweezers or something similar.


Do the same on the wrong side of each flower curling all the petals inwards.


Here is a picture of all the flowers with the petals curled up.


Carefully uncurl the petals and on the right side of each flower emboss the center till they resemble the above picture


On the back of 5 flowers, put a small amount of PVA glue in the center. Now the fun begins, start layering up the flower

Here’s a close up to give you an idea what the flower should look like when all the layers are put together.


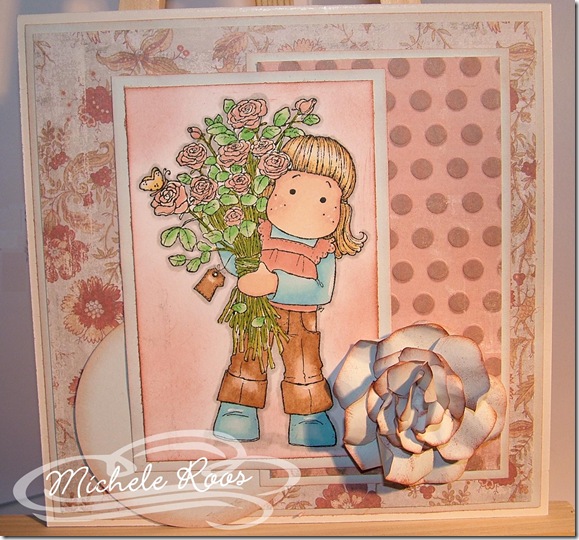
And here’s how the flower looks on a card.dscf6935

I hope that you’ve enjoyed my tutorial.

Hugs Michele x

Would you like to win $50 shopping spree in Simon Says Stamp Superstore! ?
All you have to do is click HERE to enter and join us in our monthly challenge blog at JUST MAGNOLIA challenge.

It is SO EASY TO WIN!!!
Hope to see ya there spreading the luv,
Heidi


Pin It
SUBSCRIBE TO: This Blog | Our Newsletter
WE'RE SOCIAL: Facebook | Twitter | YouTube | LinkedIn | Pinterest | Google+
TAKE THE CHALLENGE: Simon Says Stamp Challenge! | Vintage Simon Says Stamp & Show Challenge