

Happy Monday, everyone! Let me give a big HUGE thank you & cyber hug to Lols, for making this gorgeous tutorial. She is part of our family here at Simon Says Stamp, and makes such a beautiful cards I thought she could share some of her wisdom and techniques with all of us!
I am a big fan of Gruffies, especially the Bearied in Paperwork one that Lols used! Take a look below and see how she came up with this beautiful card!!
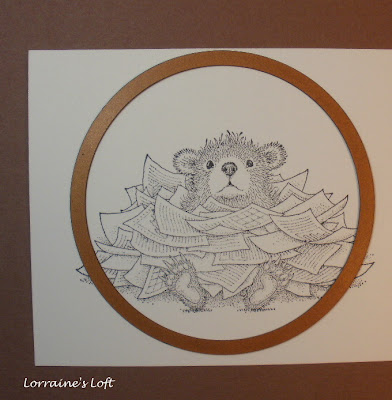
We all have a different way we do things but I always start with a stamp that I want to use. I have chosen this very cute Bear-ied in Paperwork by Stampabilities

Then I decide a sketch, I always try to find a suitable one on one of the many challenges out there :-) for this card I thought Maya's sketch on the Sketch Saturday Challenge was perfect :-) Thanks Maya xx

I then stamp the image and shape it according to the sketch ,, in this case I used my Spellbinders Nestabilities Circle die.
The next step is to choose the papers,, I love the new Basic Grey Origins paper pad and accessories and I thought they would work well with this image ,,, a bit 'graph' like :)

I then trim and make any fancy edges, I used a Martha Stewart Arch Lattice Border punch.

As I have trimmed the paper I feel that the edges need some inking :-) I use the thin cut off strips to test the colours of ink that will work best. The vintage photo ink I didn't think was quite dark enough so I added a little black to it. I ink the edges of the papers and the image.

I always use a Tim Holtz blending tool to do this, I find they really are alot better to use than bits of foam that some people use.

Now I come to the strip across the center of the card ,,, I was debating whether or not to use ribbon ,, but then thought I could ink a plain piece of card and ink a cuttlebug script folder, it ties in with the image perfectly I think ,,, :-)


Now I am ready to start coloring. I am choosing to use Copic Markers , I love these pens ! :-) They are all in stock at Simon Says Stamp !! :-) I always keep my colour chart handy, as you can see it is well used !!! It really helps to color coordinate your images to the designer papers.

I strt with the skin tones first, colour all these areas with the lightest skin shade that you use ,, in thins case I used E000

then add a darker shade to the shaded areas ,, I used E00, then blend them together with the lighter E000 I added a little R20 to the cheeks and blended again with E000

now for the fur, I decided to make him a little honey colored so used E11 and gave him a light color everywhere

then added E13 and E15 to the shaded and then blended with E11 so there were no harsh lines

I used the same technique for the papers using E40, 41 and 43

I shaded the lower area with a Warm Grey, W3, and smudged the edges with a blender pen.

OK ,,, all done ,,,, now it all comes together :-) While I have been making this card I have been thinking fof what embellishments I have that will look good with this image ,,,,, what shall I find in my messy drawers ????
Start to assemble the card :-) think think ,,,, whats in my drawers ???

I use 3D tape for added dimension :-)

Oohh look what I found to use ,,,,,

This was on a recent parcel from Simon says Stamp !!! Perfect ,,,, recycling too !!! :-)
I also had some Tim Holtz Ideology mini paper clips and some Philosophy tags,, and some matchinhg Basic Grey Origins Epoxy Clips.

I thought that it needed a little something in the bottom right corner too. So I lightly stamped some numbers from the Tim Holtz Urban Chic set :-)
Isn't he the cutest? If Gruffies are starting to pull on your heart strings below, check out even more selection here & below:


Steph
Pin It
SUBSCRIBE TO:
This Blog | Our Newsletter
WE'RE SOCIAL:
Facebook | Twitter | YouTube | LinkedIn | Pinterest | Google+
TAKE THE CHALLENGE:
Simon Says Stamp Challenge! | Vintage Simon Says Stamp & Show Challenge
I don't usually "do cute", but this card is CUTE! Love the distressed look, even though the stamp is cute! Love the colors. Very cool!
ReplyDeleteGreat card and awesome tutorial Lols ;-)
ReplyDeleteThanks for sharing!
Janneke X
Great Tutorial, and super cute card, thanks.
ReplyDeletehugs
Sue
This is such a darling card to give a coworker or someone with a stressful office job - love this stamp!
ReplyDeleteWhat a fantastic tutorial!!! Love the card.
ReplyDeleteVery nice tutorial. The Bear is so cute. I love how you used the copics. I could use a tutorial on copics. LOL
ReplyDeleteWhat a cute card, love the tutorial.
ReplyDeleteLooks FABULOUS!
ReplyDeletethank you for your lovely comments ladies :-) I appreciate them very much xx
ReplyDeleteluv
Lols x x x
Fabulous tutorial Lorraine, loving these gruffles images. Must get a least one. Great idea with the postage label too. Gorgeous card.
ReplyDeleteHugs Suzi x
Great tutorial! I love your use of the mailing stamp. I'll have to remember that when I go to throw things away. That stamp is so cute! It would be a great "Sorry it's late" image :)
ReplyDeleteThis is a great tutorial - I found it so helpful to have the process of working explained. it's one I've been puzzling about. I'm getting rather excited about Copics too so seeing in detail how you achieved what you did was so useful. I've not come across these images before - have decided that I'll have to come back for a closer look when I have more time.
ReplyDeleteThanks for such a constructive lesson...... much love
Paula
http://pepcraftchallexp.blogspot.com/
Fab tutorial and I so want so many of these cute stamps my wish list is just getting longer thanks for sharing and a fab lesson too
ReplyDeleteJulye
fantastic tutorial
ReplyDeleteWonderful card. Thanks for sharing.
ReplyDelete