Showing posts with label faber-castell. Show all posts

Sunday, June 2, 2013

Neon Fun with Faber-Castell Design Memory Craft!


Hi Bloggers! Happy Sunday to you! Today I'm pleased to bring to you another tutorial by the fabulous Tiffany Johnson of a mixture of SSS exclusives, and Faber-Castell Design Memory Craft product!

To try these techniques out for yourself, be sure to watch the full video tutorial below:


Shop the supplies:


Thanks for reading today!


Blog Candy Alert! Join our following and comment on this post for a chance to win a special blog candy!


Pin It
SUBSCRIBE TO: This Blog | Our Newsletter
WE'RE SOCIAL: Facebook | Twitter | YouTube | LinkedIn | Pinterest | Google+
TAKE THE CHALLENGE: Simon Says Stamp Challenge! | Vintage Simon Says Stamp & Show Challenge

Friday, April 12, 2013

Art Journaling with Shari Carroll: Balance

Hi Bloggers! We're pleased to bring you the 4th installation of Shari Carroll's monthly Art Journaling Feature! If you'd like to catch up on any you've missed, click on January, February, or March!
The two photos below fabulously zoom in on special details on this month's feature, and to get a full supplies list and video tutorial, be sure to view below!

Shop the supplies:


Make your own balance page:

Thanks for reading today!


Congrats Blog Candy Winner!
From: Marvelous Magnolia Stamps: Jeanette M!
Please email me (Steph@SimonSaysStamp.com) with your address and the name of the blog you won from to claim your prize!

Blog Candy Alert! Join our following and comment on this post for a chance to win a special blog candy!


Pin It
SUBSCRIBE TO: This Blog | Our Newsletter
WE'RE SOCIAL: Facebook | Twitter | YouTube | LinkedIn | Pinterest | Google+
TAKE THE CHALLENGE: Simon Says Stamp Challenge! | Vintage Simon Says Stamp & Show Challenge

Saturday, March 2, 2013

Faber-Castell Design Memory Craft Exclusive with Tiffany Johnson!

Hi bloggers! Happy Saturday to you! Get ready to go on a mixed media crafty journey with Tiffany Johnson to make this fabulous card made exclusively for us with Faber Castell Design Memory Craft products, below!! I love how this card turned out, and how cute is this Kelly Purkey, Hello Foxy stamp set?!

Shop the supplies:


Watch this fabulous video and learn how to make your own version of this great card!


Thanks for reading today and thanks to Tiffany for this fantastic inspiration! For more Faber-Castell inspiration be sure to visit her blog and the Design Memory Craft blog!


Blog Candy Alert! Join our following and comment on this blog for a special surprise candy!

Congrats blog candy winner!
Please email me (Steph@SimonSaysStamp.com) with your address and the name of the blog you won from to claim your prize!

Pin It
SUBSCRIBE TO: This Blog | Our Newsletter
WE'RE SOCIAL: Facebook | Twitter | YouTube | LinkedIn | Pinterest | Google+
TAKE THE CHALLENGE: Simon Says Stamp Challenge! | Vintage Simon Says Stamp & Show Challenge

Wednesday, September 19, 2012

Faber Castell Feature in STAMPtember™!


Hi bloggers! Good day to you! I'm excited to bring you a gorgeous project from Faber Castell designer, Tiffany Johnson! I thought it might be fun to share a bit of history of the company with you before we get started.

 From Faber-Castell's company history page:
"Pencil-makers were first recorded in the imperial city of Nuremberg around the year 1660. Numerous craftsmen also set up shop in the surrounding villages, but especially in Stein, just within the Marquisate of Ansbach. Here artisans were not subject to the same strict controls as in Nuremberg, so they had a competitive advantage.

One of them was the cabinet-maker Kaspar Faber. At first he worked for local traders, but in his spare time he produced pencils on his own account. Soon he became so successful that he was able to set up his own business. From these humble beginnings it was to develop into a company known all over the world."

Learn more company history information on Faber-Castell's history page.


Here's a little information about our featured designer in her own words; My name is Tiffany Johnson. I’m a SAHM, an Army wife, Army daughter, avid papercrafter, music lover, dancer wannabe and pseudo-chef! I’m a very eclectic person and will try anything at least once! I love the great outdoors as much as I love curling up with a book in my club chair. As for my family, they are #1. My husband is in the Army, CJ is all about movies and video games, Liam is a professional helicopter maker (legos), and our newest addition, Lillianne Marie, loves cuddles and nursing. Our family also includes 2 furry friends, Lani (the big one) and Sandy (the little one) and 2 fishy friends (Goldie & Nemo), our goldfish.

We're really excited that this company's products and just love the way the products can be mixed and matched to create endless combinations with infinite gorgeous results!
Without further ado, here's the project!


Take a look at a step by step on how to make this beautiful piece:

Make a similar creation with the supplies below:


Be sure to check out social media on Twitter & Facebook from Faber Castell to take advantage of a really awesome sale!!

Steph


Pin It
SUBSCRIBE TO: This Blog | Our Newsletter
WE'RE SOCIAL: Facebook | Twitter | YouTube | LinkedIn | Pinterest | Google+
TAKE THE CHALLENGE: Simon Says Stamp Challenge! | Vintage Simon Says Stamp & Show Challenge

Friday, August 24, 2012

Back to School Friday FUN: Part 4!

Hello Readers! Today I have a BEAUTIFUL project from Rita Barakat from Design Memory Craft's design team, displaying some ways to make a school notebook into something stunning! Follow along with her as she explains her progress:


How do you go from this to this?
Every year as the kids go back to school I alter a composition book for me! Notes, journaling, ideas for future projects go in here!
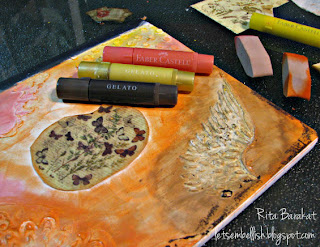
Cover the book with Gesso and then color with your favorite Faber-Castell Design Memory Craft® Gelatos™. The color is soft and easily blended with a dry sponge.

Grab your stencils and some Molding Paste or Gel Medium (heavy), spread the paste onto the stencil like frosting and carefully lift off.
*Clean your stencil right away! Baby wipe or soap and water!
You can use a heat gun to dry or set it aside.
After it was dry I went back and added another coat of Gesso -
this step is NOT necessary; the black was still showing and driving me crazy so I did it. It was not necessary as the layers would have covered it up eventually;
I wasn't sure where I was going with this so I covered it and added more color.
I included this picture because I wanted to show that you can color right on
top of your dry texture with Gelatos™.
.
Add more paste and more color...
Continue to add color, paper and embellishments
until you are happy with it.
On top of the paste add
You can see it really shines, it was the perfect accent! 

I hope this inspires you to alter your own notebook!

Thanks so much Rita, WOW that notebook really did change into something spectacular didn't it!?

Here are some of the main ingredients Rita used:

InLinkz.com

Thanks for reading today, and I hope you enjoyed our Friday Fun posts!

To win today's blog candy- just join our blog following and comment below!
The winner of the Some Odd Girl post on Wednesday is: Irene McBeatle! Please email Steph@SimonSaysStamp.com with your shipping information and the name of the blog you won from! Congrats!

Enjoy your weekend!
-Michelle


Pin It
SUBSCRIBE TO: This Blog | Our Newsletter
WE'RE SOCIAL: Facebook | Twitter | YouTube | LinkedIn | Pinterest | Google+
TAKE THE CHALLENGE: Simon Says Stamp Challenge! | Vintage Simon Says Stamp & Show Challenge