

Hello everyone!
First up, it's getting used to the wire and twisting it into the shapes you need.


2. Create the small center wire piece for the Goddess.

3. Create two longer wire pieces for the sides of the Goddess. Wrap the wire the length of
the pegs and then take the wire piece up to the top and wrap again to create one long
piece.

4. Create two top wire pieces for the Goddess. Design the first one and then move the pegs
across to the other side of the WigJig to create the second one.


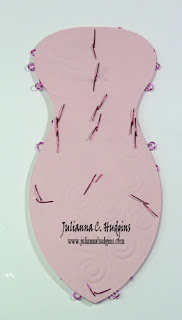
5. To shape the wire pieces lay them on top of the Goddess die template and then bend and
shape to match the curves of the Goddess.
Okay, the wire is done! Way to go! Now, let's place it onto the Spellbinders Goddess die! The Goddess die was created to embody life and symbolizes strength and empowerment of women!

6. Cut/emboss the Baby Goddess using Spellbinders™ Grand Calibur® Machine and
cardstock. Leave the paper in the die template and use it as a stencil to airbrush with

7. To attach the wrapped wire piece to the Goddess cut small pieces of Rose 24 Gauge wire, use
a paper piercer to punch tiny holes, bend small pieces of wire in half and put through the
holes, then bend flat in the back to hold in place.


8. To create the stamped background randomly stamp onto the paper and then lightly ink the
edges.
9. To create the black Goddess outline lay the die template onto the black cardstock and
trace around the die. Then fussy cut the image.

10. Stamp the sentiment on to white cardstock and cut/emboss tag using S5-144 Jewel
Framed Sentiments. Cut/emboss a second tag using black cardstock. Layer the two
pieces and add 3D Foam Squares to the back and adhere to the top of the pink mat. Then
add two small wire wrapped pieces to the top of the card on each side of the tag.

11. Layer the stamped background on to the black mat and adhere to card front. Then layer
and adhere to card front. Add rhinestone embellishments.
Here are some Beadalon products, and the other ingredients for this card!
 |  |  |  |  |  |
 |  |  |  |  |  |
 |  |  |  |  |  |
 |  |  |  |  |  |
 |  |  |  |  | |
 |  |  |  |  |  |
 |  |  |  |

Thanks so much Julianna! And guess WHAT?! Julianna's blog has a special coupon code for you to use for 20% off Spellbinders products! Oh yeah! Go to her post now to see more!

To win today's blog candy, join our blog following and comment below!
Thanks for reading today, and our STAMPtember™ has just begun! Stay tuned the whole month to see more projects from designers and have special deals!

Pin It
SUBSCRIBE TO:
This Blog | Our Newsletter
WE'RE SOCIAL:
Facebook | Twitter | YouTube | LinkedIn | Pinterest | Google+
TAKE THE CHALLENGE:
Simon Says Stamp Challenge! | Vintage Simon Says Stamp & Show Challenge
Lovely! I bought a little wire thingamajig a long time ago but never got the hang of it. ;)
ReplyDeleteWow, I never knew you could be so creative with a Wire Jig. I've seen them but never had the opportunity to play with one.
ReplyDeleteThat is super cool!
ReplyDeleteNever seen a wire jig before...that's pretty cool! Thanks for sharing.
ReplyDeletethanks for showing me something new to try on my projects!
ReplyDeleteI want you to know that my pinterest board is overflowing with goodies from your store! I try to pin a few every day! this is great fun! :)
So that's how that works!!!!!
ReplyDeleteThis is so neat!
ReplyDeleteoh thats so cool. I have one of those wire making things and have never used it, Thanks for the inspiration.
ReplyDeleteLynn
Beautiful project. Love the texture of the wire.
ReplyDeleteThat is pretty darn cool! Thanks for sharing this!
ReplyDeleteThat looks pretty cool. I've used wire a few times on projects, but nothing this involved. Amazing. :)
ReplyDeleteThat's cool I always thought this was made by hand
ReplyDeleteVery pretty! :)
ReplyDeleteWow this is very intricate. Love the details, but I don't know if I'm brave enough to venture there. I would really need to put on my patience hat (lol). Love all the details that went into this. Beautiful! Smooches...
ReplyDeleteThis is awesome project! Combination of wire and paper - brilliant and creative!
ReplyDeletesomething new to me...what a cool technique to create custom shape!
ReplyDeleteHow awesome is that, need to try for my self.
ReplyDeleteHow awesome is that, need to try for my self.
ReplyDeleteWow, thats new, never seen it before, a great teknik.
ReplyDeleteChristina P.
Amazing! Absolutely amazing! What more can I say? TFS!
ReplyDeleteWow, what a great project, who knew wire could look so cool. Thanks for sharing!!
ReplyDeleteI like to work with wire and beads but I never thought I could combind them with my card making! Thanks for the new ideas!! :) *denise*
ReplyDeleteSo cool! I love this idea.
ReplyDeleteSo pretty! I have never seen wire worked like this on a card...it's gorgeous!
ReplyDeletewhat an original idea!
ReplyDeleteVery interesting technique and very pretty results. Iris
ReplyDeleteYEAH!! I LOVE the AWESOME card and tutorial!! =) THANKS for sharing and for the GREAT CODE!! Also, for the chance to win!! Have a FABULOUS WEEK!! =)
ReplyDeleteI've seen Julianna's work on Tv shows. She's super talented. Thanks for the tute.
ReplyDeleteSuper stunning!!
ReplyDeleteWhat a very interesting look with the use of wires! Something to keep in mind for a future project.
ReplyDeleteNeat idea! Would have never thought of useing wire.
ReplyDeleteWOW, what a fun idea! Beautiful!!
ReplyDeleteWow - what an amazing and unusual idea!
ReplyDeleteVery cool with the wire--something I would like to try.
ReplyDeleteOh, wigjig! I have thought about getting one, so glad you carry them! Lovely project, I haven't thought about using wire items on cards :)
ReplyDeleteThat was a really neat project with the wire. Thanks for sharing.
ReplyDeleteWow! That looks so intricate, but it's a really neat project.
ReplyDeleteThat is sooooo Cooooool!
ReplyDeleteNeat! I would never have thought of using wire to decorate a card! TFS!
ReplyDeleteThis is beautiful!
ReplyDeleteGreat technique. Thanks for sharing,
ReplyDeleteGreat project. I have never tried to use wire on a card. TFS
ReplyDeleteGorgeous!! and great tutorial!
ReplyDeleteWoW!! This is SO pretty :)
ReplyDeleteWow, I have to dig out my wire jig thing.
ReplyDeleteWow that is so kewl love the wire jig and what you've created with it :)
ReplyDeleteWow, that is such a beautiful and intricate process! TFS
ReplyDeleteI've seen the wire jig used previously, but never with a card. Very nice! Love it!
ReplyDeleteFabulous project- love the wound wire on it!
ReplyDeletethe work in today's project is just beautfiul, thanks for sharing it with us.
ReplyDeleteThis is so cool! Never seen anything like it! Thanks so much!
ReplyDeleteI'm enjoying the Stamptember! Learning lots of new techniques - thanks!
ReplyDeleteI always love to learn something new! Thanks for the great tutorial. :D
ReplyDeleteVery cool wire art!! I haven't done anything like this but may have to now. It's really beautiful!!
ReplyDeleteJulianna's products are absolutely amazing! She always inspires me!
ReplyDeleteGood piece of work! Fantastic!
ReplyDeleteThat is a lot of work, but very pretty outcome. I don't think my arthritic hand could handle it.
ReplyDeleteLoving Stamptember.
I'll trust you on the difficulty of this! It looks hard to me. :)
ReplyDeleteWow that is awesome but I, also, think there is no way I could dot that.. I would have one major wire ball... LOL!
ReplyDeleteOh my that's awesome! Looks great and semi-complicated/easy! LOL =)
ReplyDeleteThis is just sooooooo gorgeous. I´m totally in love with this look here, and will give it a try very soon.
ReplyDeleteI remember seeing the Beadalon several years ago and thought it was the coolest thing ever. I still think it's pretty amazing and would sure make forming wire into fun embellishments easy.
ReplyDeleteHow pretty! I have never seen anything like that before.
ReplyDeleteWhat a neat project. That bendable wire is fantastic. I can think of several ways to use it on a card, especially on Christmas cards.
ReplyDeleteYou make that look very easy. Your project is great, and gives me lots of ideas...hmmm
ReplyDeleteWow!! That looks awesome, fabulous idea!!
ReplyDeleteHugs
Hazel xx